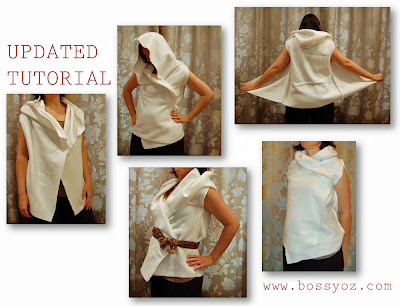
UPDATED - Fleece hoodie wrap re-creation tutorial
This is an update of the previous version of the tutorial.
N.B. I am using a small scale pattern to show the various steps.
I have also added a Flickr group, as I would love to see your creations.
It actually wasn't that difficult, and all done in a few hours whilst eating breakfast, feeding the littlest one, doing laundry, emptying the dishwasher and accepting a delivery. It took me longer to type up this tutorial than put together the wrap thingy!
If this is the end of the post, please click "read more" for the full tutorial! If there is more text below this paragraph, then you are already viewing the full tutorial.
This is a loose fitting garment so you don't need to be that precise when measuring and cutting. Fleece is also soooo forgiving!
I suggest you read the whole tutorial before you start as there are some useful notes at the end.
You only need three pices (plus sleves if required). Below I'll describe how you create these three pieces in more detail (and with plenty more pictures in this updated version of the tutorial).
If you'd like it more professionally looking and including sleeves, I suggest you use a pattern for the back piece and the sleeves, but create the front/hoodie as described.
For the back piece, use an old t-shirt, cardigan or sweater as a template. The important is to get the width right. Again, it is a loose fitting garment, so no need for extreme exactness. Cut one back piece.
For the front/hoodie pieces, firstly, you need to measure yourself from side to side over your tummy, widest part, no cheating! This measure plus some for the seam allowance is the width of your combined front/hood pieces. This is the short end of the blue fabric in the picture above (apologies for the wonkiness!). I measured 45 cm (post babies and all that...).
Secondly, to figure out the length of your combined front/hoodie pieces you need to measure on your back piece (the one you created based on an old t-shirt, cardigan, sweater).
I am showing how I did the measuring with my fronts/hood pieces as the pieces used to show these steps in reality are doll size and a tape measure would just make it look really really odd.
On your back piece, measure the length from bottom of the side hem to under the arm (to yellow pin, first picture below), to the top of the shoulder (to red pin, second picture), then along the shoulder line (to blue pin, third picture), to the middle of the back (to white pins, final picture). Add all these measurements together. I ended up with 70 cm.
Once you have this measurement, then add the size of the hoodie. I used 35 cm for the height of the hoodie. In total I ended up with 105 cm (70+35).
I cut my rectangular pieces 50 cm by 110 cm. Two of these! Make a mark 35 cm (in my case the white pin) down from the top to show where the hoodie ends and meets the centre back of the back piece.
Now you should have three pieces: two rectangles and one back piece. (If you are doing sleeves, you also have two sleeve pieces)
Stitching next!
I started by putting the two front/hood pieces right sides together, then stitched the top of the hood from the front to the centre back along the red line in the picture below (ending at the centre back, marked by the white pin in the previous picture).
Spread out the hoodie/front pieces to expose the seam just sewn (white arrow).
Then attach the front/hood to the back piece at the centre back and along the shoulder seams. Above from the side of the hoodie fabric, below from the back piece side.
Stitching from sleeve end to the centre back on one side, then the same from the other sleeve end. Or if you are lazy, just start from one sleeve end, and go all the way to the other end in one go.
This is what your garment should look like now:
Next, pin the two pieces of fabric together across the opening for the sleeve.
Then pin along the side seam. Once you have pinned along the side, remove the pins for the sleeve (so you don't forget NOT to stitch there!).
Then pin the other side seam the same way.
Stitch the two side seams and turn to right side.
That was it!
Hopefully the extra pictures and the amended text has made the tutorial easier to follow!? Please let me know if you have any comments or questions.
Note: If you find that the hoodie comes out like a jedi costume, try trimming back on fabric width as it is important not to get the hoodie too large!
It would be lovely if you shared your creations in the Flickr fleece hoodie wrap group. Fingers crossed I got this right, please shout if not!
If you'd like to purchase the original item, please visit Me and D on Etsy.
The small print: I am happy for you to use this tutorial to make these for yourself or to give away to your friends, but I suggest that you check with Me and D if you are planning on selling them.


Comments